
 Tiếng Việt



People new to moldmaking often ask the same question: “Silicone is silicone, so why does one cost two or three times more than another?” The answer is the catalyst. Two-part liquid mold making silicones on the market fall into two main families. One cures with tin (tin-cure, also called condensation cure), the other cures with platinum (platinum-cure, or addition cure). They look quite similar and pour out just as soft and flexible, but how they react with the master, how they hold up over time and whether they can be used for food are completely different.
If you aren’t sure how silicone molds work yet, read the post what is a silicone mold first. This post goes one step further: choosing the right silicone for each job and avoiding a few costly mistakes that every shop has made at least once.

How the two cure systems differ
Tin silicone cures by condensation. When part A is mixed with the tin catalyst, the polymer chains link together and release a small amount of by-product molecules. According to Wikipedia’s description of silicone rubber, the condensation reaction needs a little moisture from the air and produces by-products during curing. That slow release of by-products is why tin molds shrink more over time.
Platinum silicone cures by addition. Two functional groups on the polymer chains bond directly to each other with the help of the platinum catalyst, and no by-product is formed. Nothing evaporates, so the mold holds its dimensions very well. This reaction can also be sped up with heat, and many shops put molds in a low-temperature oven to cut the waiting time.
The weakness of platinum is that it is “picky”. The platinum catalyst is easily “poisoned” by sulfur, tin and some amine compounds. When it meets these, the silicone won’t cure, or the outer layer cures while the layer against the master stays sticky. Tin silicone is much more forgiving and is barely affected by most pattern materials.
Quick comparison table
| Criteria | Tin silicone (tin-cure) | Platinum silicone (platinum-cure) |
|---|---|---|
| Price | Noticeably cheaper | More expensive |
| Shrinkage over time | Shrinks more | Very low, dimensionally stable |
| Shelf life of a stored mold | About 1 year for budget grades, a few years for good grades | Can be decades |
| Sensitivity to contaminants on the master | Low | Very high (sulfur, tin, amines, uncured 3D printing resin) |
| Food contact | Usually not used | Some grades are rated for food contact |
| Heat acceleration | Limited | Yes |
| Best for | Short-term molds, casting plaster and resin, difficult masters | Long-life molds, precision molds, baking and chocolate molds, archiving valuable pieces |
Smooth-On (USA), one of the world’s largest makers of mold rubber, says in its FAQ that standard tin molds only last about a year in storage, better tin grades about 5 to 7 years, and platinum molds can last over 30 years. They also note that museums usually choose platinum silicone when molding valuable artifacts. The exact numbers vary by product, so always read the technical data sheet (TDS) for the specific product you buy.

Shore A hardness: how much is right
Silicone hardness is measured on the Shore A scale. The lower the number, the softer the silicone. A pencil eraser is about Shore 40A, according to an example from Formlabs, which makes it easier to picture.
In practice at our shop, we usually split it like this:
- Shore A 10 to 20: very soft and flexible, easy to peel off masters with many undercuts and deep patterns. Good for small statues, reliefs, jewelry and masters with fine hair or beard detail. The trade-off is that the mold deforms easily if the walls are thin, so it needs a support shell.
- Shore A 20 to 30: the most widely used range. Soft enough to demold, firm enough to hold shape. Most molds for casting resin, plaster, soap and candles fall in this range.
- Shore A 30 to 50: firmer, holds shape well for large parts or technical parts that need accurate dimensions. A bit harder to peel off masters with many undercuts.
A small tip: when a master has both fine detail and large masses, you can use soft silicone for the first layer that hugs the surface, then pour a firmer silicone behind it. Remember to only combine within the same family (tin with tin, platinum with platinum). Smooth-On notes that condensation silicone will not cure when poured onto cured addition silicone, and vice versa.

“Won’t cure” on 3D printed masters and how to fix it
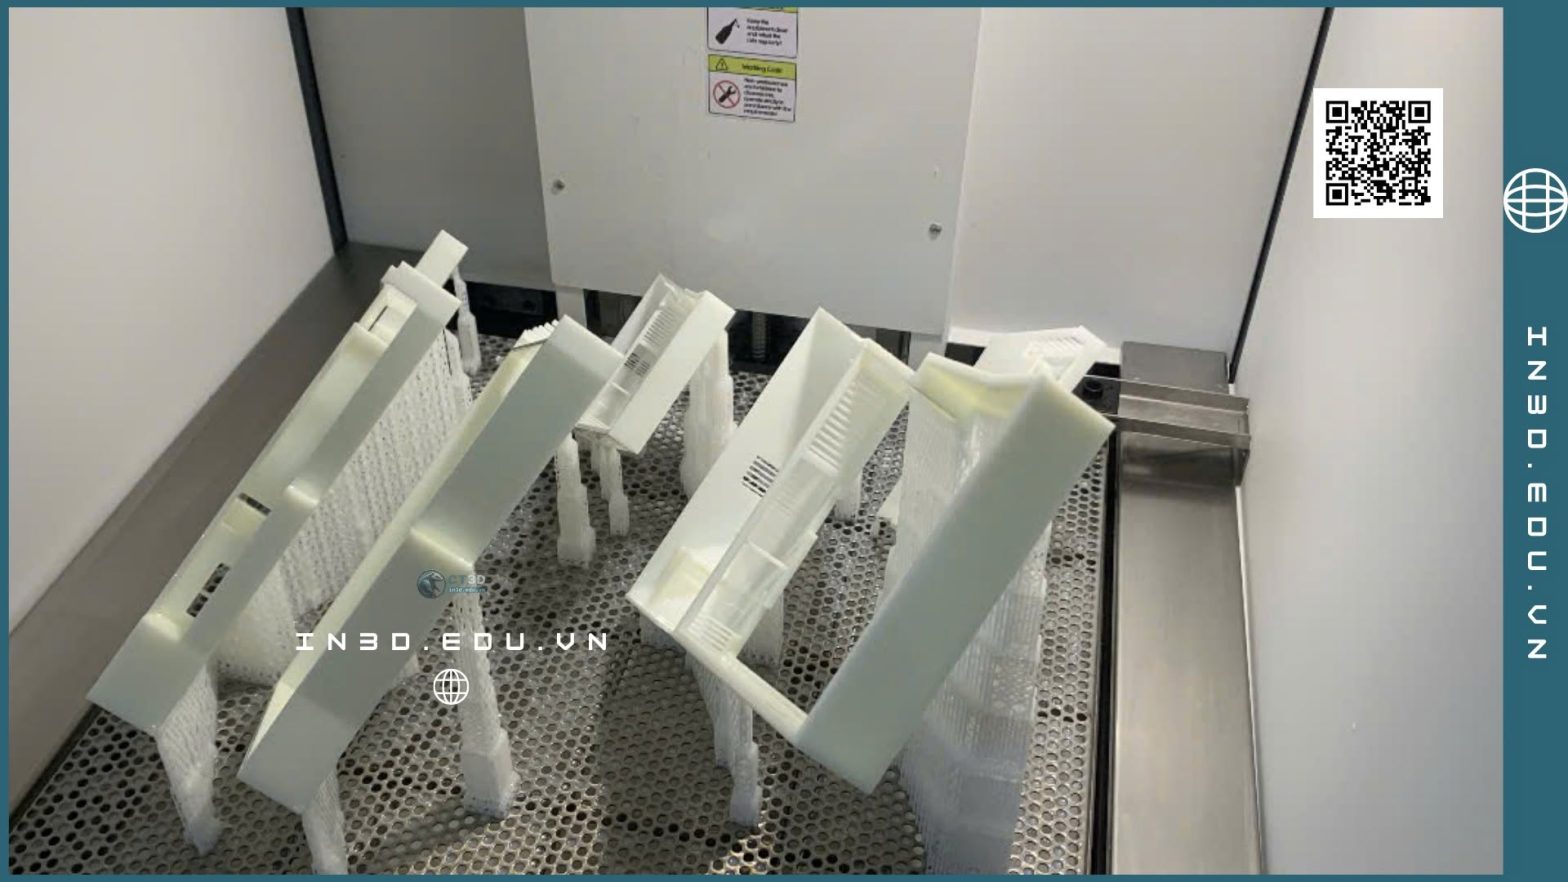
This is the most common problem when a shop starts using 3D printed masters. You print a beautiful, glossy SLA resin master, pour platinum silicone over it, wait all night, and in the morning the silicone against the master is still sticky like glue. You lose both the master and the silicone.
The cause, as Smooth-On explains: an SLA print fresh off the machine is not fully cured. Residual resin on the surface and in deep pockets and hidden corners that the UV light doesn’t reach inhibits the platinum catalyst.
Here is how we deal with it, in line with the manufacturer’s recommendations:
- Clean thoroughly: wash in IPA, then wash again with soapy water and let it dry completely.
- Post-cure thoroughly: UV cure for at least 6 hours in a UV chamber or in sunlight, rotating the master so every face gets exposed. Over-curing does no harm, under-curing is what causes trouble. Clear resin lets UV penetrate deeper, so it cures more evenly.
- Apply a barrier coat: spray 2 coats of clear acrylic or brush on a coat of surface epoxy, and wait until fully dry.
- Test first: brush a little silicone on an unimportant corner of the master and let it cure. Only pour the whole mold if it’s fine. Five minutes of testing can save a whole day of work.
- Switch to tin silicone if the master is very complex or you are not sure about the material.
FDM prints in PLA or PETG usually cause less inhibition than resin, but the layer lines on the surface will be imprinted in the mold. Smoothing prints before molding is covered in the post on post-processing 3D prints. For more on the differences between the two printing technologies for masters, see FDM vs resin 3D printing on the CT3D Group site.
Other materials that often ruin platinum silicone
Besides 3D printing resin, there are a few usual suspects:
- Modeling clay with sulfur: many oil-based clays contain sulfur. If you sculpt the master in clay, buy one clearly labeled “sulfur-free”.
- Latex gloves: latex can cause inhibition. Use nitrile or vinyl gloves when mixing and handling.
- Old tin silicone: pouring platinum onto a tin mold, or sharing cups and stir sticks with tin silicone, is enough to cause failure.
- Tape, hot glue, some paints and incompatible release agents.
- Some woods: Smooth-On tested 44 types of uncoated cross-cut wood. Tin silicone was inhibited by only one (red pine), while platinum silicone was inhibited by four, including some pines and basswood. With at least two coats of clear acrylic, both types cured normally. Keep this in mind when you make CNC wood molds or use wood masters.
The general shop rule: if you’re not sure, test on a small piece first.

Food safety: not every silicone can make baking molds
Customers often order chocolate molds, mooncake molds, candy molds and ice molds. For these, you almost certainly need a platinum silicone certified for food contact.
In the US, the regulation usually cited is FDA 21 CFR 177.2600. This section covers rubber articles intended for repeated use in contact with food, lists the permitted polymers and additives, including silicone elastomers, and sets limits on total extractives from the food-contact surface when tested with water and with a solvent simulating fatty foods.
A few things to understand correctly, taken from the manufacturer’s own notes:
- “Meets 21 CFR 177.2600” does not mean “FDA approved”.
- The silicone must be mixed at the correct ratio and usually heat post-cured according to the instructions to comply.
- Some grades are only suitable for dry and aqueous foods, not for long-term use with fatty foods like butter or chocolate.
- When baking, keep the temperature below the manufacturer’s limit (some grades list about 204°C) and don’t place the mold near a direct flame.
Tin silicone should not be used for anything edible. The reason is simple: the tin catalyst and the by-products of the condensation reaction are not something you want on your cake.

Two-part mold or glove mold: choose by the master’s shape
Once you’ve picked the silicone, the next question is what kind of mold to make. There are three common types in the shop.
One-piece block mold
Like a freezer ice tray. Place the master on a base, build a mold box around it and pour silicone to cover it. The master needs one flat face as a base and no very deep undercuts. The advantage is that the part has no seam lines, and every other face is continuous. Good for badges, reliefs, soap, candles and keychains.
Two-piece mold
Used for masters with no flat face or with deep undercuts, such as round statues or technical parts that must be cast in one piece. The master is half buried in clay (sulfur-free if using platinum), the first half is poured and left to cure, then the mold is flipped, release agent is brushed on and the second half is poured. Formlabs notes that two-piece molds are more complex, and if the halves don’t fit tightly they leave flash lines on the part. You need registration keys, a pour channel and vent holes.
The two-piece mold is the basic type for vacuum casting. That process is already covered in the post on vacuum casting, so we won’t repeat it here.
Brush-on or glove mold
Thickened (thixotropic) silicone is brushed onto the master in layers, each a few mm thick, then a rigid outer shell of plaster or composite is made around it to hold the shape. To demold, the silicone layer is peeled off like a glove.
According to Smooth-On’s guidance, brush-on molds suit masters of any size, including upright masters or those fixed to walls and ceilings. This type uses less silicone so it is much cheaper in materials, but it takes more labor and careful planning. Pour-on molds are fast and low-effort, often done in a day, but they use a lot of silicone.
From practical experience: for masters under about 30 cm, pour a block mold for speed. For statues half a meter or taller, large reliefs and decorative columns, make a brush-on mold with a composite shell, which saves a lot of silicone. The fiberglass support shell is made the same way as a composite FRP mold.

How to calculate how much silicone to buy
Underestimate and you run out of silicone halfway, leaving the mold delaminated. Overestimate and you waste money, especially with platinum. There are two ways to calculate depending on the mold type.
For pour-on molds
A simple formula:
Silicone weight (g) = (Mold box volume − Master volume) × silicone density
Mold silicone density is usually around 1.1 g/cm³; check the exact figure on the TDS for your product.
Example: the inside of the mold box is 15 × 10 × 8 cm, or 1,200 cm³. A small statue master is about 300 cm³. The volume to pour is 900 cm³, times 1.1 gives about 990 g. Add 10 to 15% for loss on cups and sticks, and you need roughly 1.1 to 1.15 kg.
Don’t know the master’s volume? There are three ways. If you have the 3D file, slicer or CAD software gives the number right away. If you only have the physical master, dip it (sealed) in a jug of water and measure the displacement. The quickest way is to fill the mold box around the master with rice or plastic pellets, pour them out, weigh them and convert.
A tip to save silicone: leave about 1 to 1.5 cm of wall around the master, which is enough for small masters. The closer the mold box follows the master’s shape, the less silicone is wasted. Some shops 3D print the mold box to follow the master’s shape, as described in the post on 3D printed molds.
For brush-on molds
Calculate from the master’s surface area times the silicone layer thickness. If you want a total thickness of 6 mm (0.6 cm) on a master with 2,000 cm² of surface area, the silicone volume is about 1,200 cm³, times 1.1 gives about 1.3 kg, plus brushing losses (usually higher than for pour-on molds, about 15 to 20%). Surface area from a 3D file is the most accurate. If the master has been 3D scanned, mesh processing software gives the area right away.
Choosing silicone in 5 questions
When we take a mold order, we ask ourselves in turn:
- Will the product touch food or skin? If yes, choose a certified platinum grade, done.
- What is the master made of? 3D printing resin, sulfur clay or pine: either treat the surface very carefully or use tin.
- How long will the mold be used, and does it need to be stored for future casts? One run of a few dozen pieces and then discard: tin is enough. Mold needs to be stored for years and recast for repeat orders: platinum.
- How dimensionally accurate does the product need to be? Assembly parts and device housings: platinum, because it shrinks less.
- What is the master’s shape and size? This decides the Shore hardness and whether to make a pour-on, two-piece or brush-on mold.
The number of casts depends on many factors: the casting material (PU and epoxy wear a mold faster than plaster or wax), the master’s complexity, the heat released during curing and how the mold is stored. The CT3D silicone mold service page gives a reference of about 20 to 100 pieces for art molds or PU casting. If you want thousands of pieces from the same master, consider a rigid mold.

Storing silicone molds so they last
- Clean, dry and store in a cool, ventilated place out of the sun.
- Store the mold in its proper position, with its support shell or reassembled with the old master so it doesn’t distort.
- Don’t stack heavy objects on the mold.
- Label tin molds with the date they were made. After a while they dry out, become brittle and shrink. Don’t wait until a new order comes in to find out the mold is ruined.
- With PU resin and epoxy, apply a suitable release agent between casts to extend mold life.
Frequently asked questions
Is tin silicone much cheaper, and should I use it for everything?
Tin is noticeably cheaper and easier to use. For short-term molds and casting plaster or resin in moderate quantities, tin is a sensible choice. But if you need a long-lasting, accurate mold or one for food, choose platinum.
Can I pour platinum silicone onto an old tin silicone mold?
Better not. The two silicone families don’t cure when poured onto each other. If you must repair a mold, use the same type of silicone as the original.
Can a resin 3D printed master be used for a platinum mold?
Yes, if you clean it, UV post-cure it long enough, apply an acrylic or epoxy coat and test first on a small corner. If the master has many deep pockets, tin silicone is safer.
How long before a silicone mold can be demolded?
It depends on the type. Some fast-cure grades take about 30 minutes to a few hours, standard grades are usually left overnight. Platinum silicone can be sped up with gentle heat, but don’t exceed the temperature allowed on the TDS.
How do I know if the silicone I bought is tin or platinum?
Read the TDS or label: “tin-cure” or “condensation” means tin; “platinum” or “addition cure” means platinum. The mix ratio is also a clue: many tin grades mix 100:10 or 100:5 by weight, while platinum often mixes 1:1. If you’re not sure, ask the supplier.
Need a silicone mold made from your master?
If you already have a physical master or a 3D file, the CT3D technical team can help you choose the silicone type, hardness and mold type, and quote based on your exact master. If you don’t have a master yet, you can start from design, SLA resin 3D printing for the master, then make the mold. See how costs are calculated in the post on silicone mold pricing and how to make a two-piece mold, or browse mold services at CT3D Group.
Contact hotline/Zalo 0975 008 728 to send photos of your master or a 3D file.
Related posts
- What is a silicone mold? A low-cost way to reproduce parts
- Vacuum casting from silicone molds
- Rapid 3D prototyping of models and masters for silicone molds
- Rapid prototyping and 3D printing costs
- Post-processing 3D prints before molding
References
- Smooth-On, FAQ: What are the major differences between tin-cure and platinum-cure silicone mold making rubbers? https://www.smooth-on.com/support/faq/184/
- Smooth-On, FAQ: My silicone rubber mold did not cure against my SLA 3D printed model. https://www.smooth-on.com/support/faq/210/
- Smooth-On, FAQ: How long can I store my rubber mold in a mold library? https://www.smooth-on.com/support/faq/146/
- Smooth-On, FAQ: Will wood surfaces cause silicone cure inhibition? https://www.smooth-on.com/support/faq/199/
- Smooth-On, FAQ: Pour-on vs brush-on. https://www.smooth-on.com/support/faq/125/
- Smooth-On, FAQ: Food safe rubber. https://www.smooth-on.com/support/faq/126/
- Formlabs, How to make silicone molds. https://formlabs.com/blog/how-to-make-silicone-molds/
- Wikipedia, Silicone rubber (curing systems). https://en.wikipedia.org/wiki/Silicone_rubber
- U.S. eCFR, 21 CFR 177.2600 Rubber articles intended for repeated use. https://www.ecfr.gov/current/title-21/chapter-I/subchapter-B/part-177/subpart-C/section-177.2600

